Thursday, 26 December 2013

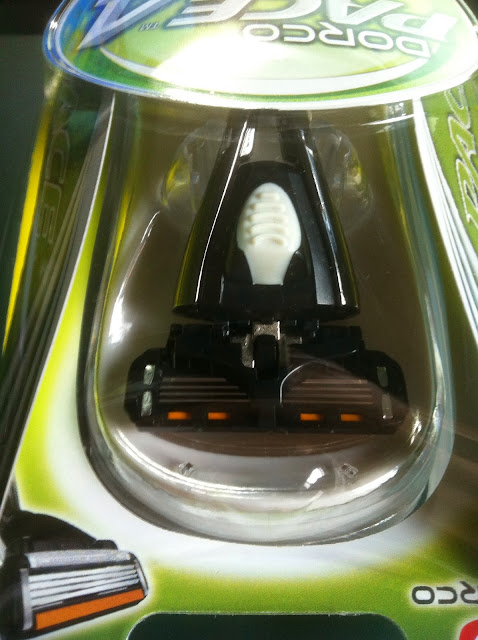
Dorco Pace 4 Shaving Kit

I got the Dorco Pace 4 Blade shaver recently. It is a 4-blade shaving kit from Korea. It is quite popular there and they even have a 6-blade shaving kit called the Pace 6. Gillette has only 5-blade for its top-line Fusion shaver series.

One of its unique features for the Dorco shaving kit is its open docking system for its replacement cartridge. This means for the same handpiece, it can interchange from a 3-blade cartridge to 6-blade cartridge, without buying a new shaving kit. You cannot do that with a Gillette.

There is also a huge cost difference between the Dorco and the traditional Gillette. The Dorco Pace 4 blade shaver costs SGD10.90 with its replacement 4 cartridge replacement at SGD12.50. Compare that to the Gillette Fusion where its replacement set can go up to around SGD25++

The Dorco shaving kit can be obtained from the following website: www.shavingsg.com.

Here are the unboxing photos and comparing it against a 5-blade non-Gillette shaver from Watsons.


The handle is in white.


Top view.


Back view.


Blades made in Korea but the handle is made in China.


Cover opened.


Another view.


The handle is in non-slip rubber for a good grip.


The neck view.


Another view of the 2 shavers.


The Dorco Pace 4 on the left with the Watson's generic shaver on the right. 


Another side by side view of the shaving blades.


These 2 shavers uses their own unique system of attaching itself to the cartridge replacement.

I have used the Dorco shaver couple of times now and I really liked the close shave it provides. Of course, a proper shave also depends on 2 other components which is hot water and a good shaving cream / foam with moisturiser.


Saturday, 7 December 2013

Kartell Bourgie Lamp - Dimmer Switch Repair

I have 2 Kartell Bourgie Table Lamps, both in crystal. For a Kartell designer product, I have to say that the dimmer switch of these table lamps are quite flimsy. I broke the spindle of the first Bourgie lamp dimmer switch. It costs GBP24.24 to replace a similar original Kartell dimmer switch. Or I can use a butt ugly generic dimmer control below.

The generic dimmer switch in white PVC plastic.

There is another way but it is a temporary solution, using the existing dimmer switch, but without the broken dimmer spindle.

Here is how you do it.
Please make sure that the lamp is unplug from the main wall socket.

Below the dimmer switch, there is a screw. Unscrew it


Remove the screw and the top plastic cover of the dimmer switch. The picture 
above shows the clear plastic spindle. 


You will notice that the spindle wheel is next to the black circular device. You
turn the clear spindle, which turns the black circular device, which controls
the intensity of the lamp. Most probably, the connector between clear spindle
and the black circular device is broken. 


Gently lift up the clear spindle.


Another view.


On the other side of the black circular device, there are remnants
of the clear spindle axle connector left behind. This clear small spindle
 connector can be turned, even by using your fingers. Clockwise to increase
 intensity and counter-clockwise to decrease it.


The clear small spindle axle is the key to this problem. Give a good guestimate and turn it clockwise. You can turn it all the way for maximum intensity of the Bourgie lamp or maybe halfway. 


Leave out the spindle outside. Put back the top casing and screw it back on.


Connect it back to the wall socket. Turn it on. The lamp should be
immediately lighten up.


As mentioned earlier on, this is a temporary solution for the Bourgie Lamp. The intensity of lamp cannot be adjusted from the dimmer switch. It has to be opened up and adjusted from the black circular device I mentioned above. Otherwise, I find the dimmer switch is still in working condition, without the dimmer spindle itself. I do not want to replace it with a new dimmer switch until the existing one is truly faulty.

Eventually, my second Kartell Bourgie Lamp dimmer switch had its spindle broken. But this time, I was careful and I know what to expect. I did not aggravate the spindle. So instead, I opened up the clear dimmer switch and glued the clear spindle back to its axle. So the 2nd Bourgie Lamp is saved.

My advise, to Kartell Bourgie Lamp owners, is to be extra gentle with the dimmer switch. The connector axle between the clear spindle and the black circular device is very thin. It can be easily broken.

I hope my posting help.

8th Sept 2018 Update: Have a look at my other posting where I replaced with another Kartell Dimmer Switch

Saturday, 30 November 2013

Apple Clone Two Port USB Charger

I bought this generic 2-Port USB charger on my recent trip to KL. It costs RM 25.00 (SGD$9.80). The design is obviously a Apple rip-off but what attracted me was its USB charging output capacity. One port has an output of 2.1A. This is suitable iPad and iPhone. The other port has an output of 1A. This is suited for Blackberry and Kindle. I plan to use this for the bedroom, together with the Innergie 2-in-1 Cable Charge and Sync, which I blog about here

The unboxing photos.


The box design looks familiar.


It can charge practically the whole iDevice family.


There are 2 ports out.


It is a 2 piece device, similar to the Apple charger.


The 2 ports out are labeled


Does it look familiar?


There is a light indicator on the USB Charger. I do not think its LED though.


The 2.1 Amp output works on iPad.


It works on Blackberry but I was not able to capture it in time.

Other USB charger that I blogged about

1) The Morries Worldwide Travel Adapter with USB. Output of only 500mA.

2) 4-Port USB Charger

3) Arctic 4-Port USB Charger

Monday, 25 November 2013

Fahrenheit Suites Kuala Lumpur: Reviewed

The family decided to stay at the Fahrenheit 88 Suites KL on the Deepavali weekend. It is a service apartment, located at the Bukit Bintang area. Location wise, it wins hands-down. I have placed a google map of the location below. Fahrenheit Suites is located within the Fahrenheit 88 building. It is indicated by the 'A' pin. In front of the building, is the Grand Millennium KL, indicated by the blue circle. I have stayed here before and I blogged about it here. Between the Grand Millennium KL and Fahrenheit Suites is Jalan Bukit Bintang, the main thoroughfare. Diagonally across Fahrenheit Suites is the Pavilion Mall KL. This is indicated by the red circle. The mall is a massive building. So having meals here is not a problem. Not far from the mall is KLCC Suria. It is connected by a covered overhead walkway from Pavilion.

Red Oval: Pavillion Shopping Mall
Blue Oval: Grand Millennium & Copthorne Hotel
Yellow circle: Current taxi drop-off area


Fahrenheit 88 used to be called KL Plaza. It was owned by the Berjaya Group but I read it is now owned by the Pavilion Group. It is a mixed unit comprising of retail units on the first few floors, offices and private residential. I believe Fahrenheit Suites converted some of these residential units to service apartments.

Street view. The red arrow in the picture above is on Jalan Gading
The check-in lobby to the Suites is located on the 5th floor of the building via a pair of private lifts. Locating these lifts is quite confusing. Please refer to the image above. This is the street level map. With Jalan Bukit Bintang in front, you would need to go out of the building and around the corner to a side road. It is called Jalan Gading. Go down a slope until you reach a Loading/Unloading area. The lift lobby is located behind this area.

If you are taking a cab, it is better to drop off at the main entrance along Jalan Bukit Bintang, rather than the taxi stand behind the building. Going up the slope with luggage can be quite a challenge. Or better yet, get the taxi driver to go Jalan Gading and dropped you at the lift lobby entrance. At the time of this blog, there is no entry from Jalan Bukit Bintang into Jalan Gading due to construction work. Once you are familiar with the lift lobby entrance and the various floors, you can access the lifts from the mall itself.

When we arrived, our taxi driver dropped us at the back of the building at the taxi stand. What made it worst, none of the security personnel are aware of the way to the lobby lift entrance. We were presented with 2 options, either we go through the shopping mall and locate the lifts or we go around the corner along Jalan Gading and try to find this entrance. We decided to go through the mall. Fortunately, the 2 security personnel on duty here are the only ones that know the lifts location and were able to point it to us. It is tucked away behind some shops. Again, there are no signs indicating of its existence.


This is the view of the street level entrance. These 2 boys are very helpful and hardworking. But do note that they are not always there to greet and help you with the luggage trolley. So you would still need to bring your luggage to the 5th floor on your own. The white podium you see on this picture will be tucked away at a corner. The lift to the 5th floor is located behind the glass door at the background of the picture. Do note there is also another entrance on the right. I think that goes to the office building.


Coming out from the lift on the 5th floor, you will come across this hallway. 
The 2nd door on the left is the Check-In Reception.


 This is taken from their website. This is their check-in counter. 
These 2 boys are their staff.


Around the corner from the check-in desk, is the waiting area. 
Taken from their website.


This is the actual image, taken when we checked-in


So we got our keys and we proceed to our room, on the 15th Floor. We got out from the lift to this creepy sanatorium-coloured hallway.
Towards our room.


The other way. 


The green hallway reminds me of the hallway scene in The Shining. 
I hope I dont meet anyone at the end ofthe long hallway.


Upon entry, on the left is the dining table. Next to it is the kitchenette area.


In front of the sofa, is the coffee table and TV.


The kitchenette area is quite decent.


Another view of the living area. Facing is the entrance door.


Image taken from their website. You can compare and locate the missing items
from this image and the actual photos.


The hallway to the 2 bedrooms.


The 2 twin bedroom


Another view. The toilet is sharing.


The closet. The safe is located here. I do not know why it is
 not located in the master bedroom.


The master bedroom.


The toilet door.


The toilet is decent enough.


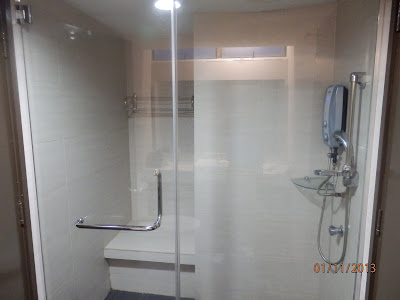
The shower area.

The room decor could have been better. Our bed-sheets were not clean. There were numerous dried water stains on the sheets which terrified The Wife. I dread to know the condition of the pillows.

Wifi is chargeable at a ridiculous rate. It is complimentary at the common area like the lobby. That was the reason I bought the TP-Link 3G Mobile Wifi, which I blogged about here. It is a Mobile Wifi which can support up to 10 devices. So I used it for 2 iPhones, 3 Blackberries and an iPad. 

Thankfully, the aircon and water heater works fine.

Fahrenheit should set its standard much higher. The above are some areas which it should work on. One standard bearer is the It should look up to Ascott KL. I have stayed at the Ascott several times. Unfortunately for Fahrenheit, that is where we are going on our next trip.

If you have any questions with regards to the condition of this place, do let me know. Leave a comment below and I will try to help.