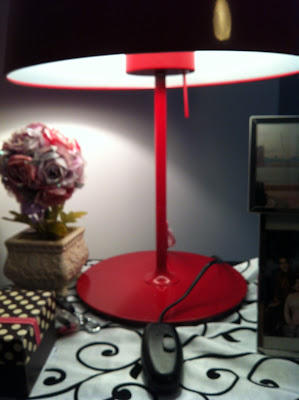
I have 2 Kulla lamp that The Wife and I bought from Ikea. There are several versions of this lamp. There is the floor, table and ceiling lamp. I have the floor lamp, which is black and table lamp which is red.
Its unique feature is its metallic lampshade and dimmer-touch-sensor. The touch sensor gives out 3 levels of illumination. The lamp has a very solid design to it, with its clean lines. It is heavy and the easily cleaned. There are quite a number of fans of this lamp if one was to search on the internet.
However, as with all Ikea products, there is a downside. The touch sensor is unreliable. It will only last less than a year, after which it will not turn on the lamp. This has happened to me twice. The 1st one was the black floor lamp and just last week, my red table lamp. I cannot return it as it was already discontinued and it was already a year. There is no way I am going to throw the lamp as there is nothing wrong with it physically, just that damn sensor.
I am going to salvage the lamp. I am going to replace that damn sensor. I am not an electrician but I am definitely going to try.
Here is my guide of dismantling the Kulla lamp.
This is my red Kulla table lamp.
Inside it. The lampshade has to be removed. Please do not forget
to switch off and unplug the lamp if you are trying this.
Excuse the dust.
Another view. That small red stick on the left is the damn
touch sensor.
The trick to dismantling the Kulla lamp is the bulb socket. Ikea uses
2 types of bulb socket. The one on the left is from my Kulla table
lamp. There are 2-halfs which needs to be unscrewed. Use a cloth
and strong pliers and unscrew it from the bottom half. I did not use any
cloth so the socket was badly chipped, as seen in the picture above.
Unscrew the cable compartment.
Next pull up the black socket back-plate and disconnect the wires. Again
there are 2 versions. I prefer this one as the wires are screwed on to the
backplate. The other version, the wires are clipped to the bulb socket. Take
note of the wire orientation.
there are 2 versions. I prefer this one as the wires are screwed on to the
backplate. The other version, the wires are clipped to the bulb socket. Take
note of the wire orientation.
Pull out the plastic
The wires are now exposed. The bottom half of the bulb socket can
be unscrewed.
From this picture, you can see the bulb socket is removed. You can
also see a hexagon nut at the bottom of the bell shape socket holder. That
needs to be unscrewed.
Hexagon nut removed.
Bell shaped socket holder removed. Which means.....
...the the cable compartment cover can be removed.
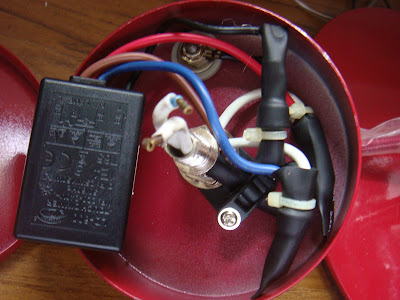
Here is how it looks inside. The black box on the left is the sensor
electronics. Do note the wiring set up. There are 2 wires that goes
into the box but 3 comes out.
Another view.
Disconnect the sensor but leave the sensor stick as it is.
Next I am going to disconnect the black box.
Done!
We only require the Red(Live) and Blue(Neutral). Which means
I have to remove the other red wire.
This red wire was the additional one that came out from the
black box.
Next, I removed the extra blue wire.
Done. It is much neater now.
I used the brown connector to merge 2 wires together.
Its quite a good device.
Another view.
Lets put it back together. Compartment cover -> bell shape socket holder ->
washer with the hexagon nut.
The bulb socket is screwed on next. Take note that I have used a
different socket this time as the original is damaged.
With the Live and Neutral orientation, I connected it
to the bulb holder. This takes some careful effort. Once
the wire is in and secure, you can do a test.
Another view.
The new replaced clip-on socket.
Another view.
The original plan was to use dimmer switch. I have used
this for my black floor lamp Kulla.
This is my Kulla black floor lamp. You can see the dimmer switch. I replaced
the original sensor with this dimmer switch. I have used this for over a year. But
when I dismantled it for this project, I could not get it to work.
It shorted itself!!
The burnt marks.
I decided not to use this dimmer switch.
Instead, I will use this!!!!
Its the Ikea Dimma cord switch. Its quite an ingenious device. It converts
your light into a dimmer lamp.
It only accommodates a 2-pin plug. From the lamp, it goes into
that socket. After which it is connected to the wall plug. The dimmer
switch is on the right of the picture.
All connected, and.....
TAAA-DAAAAAA!!!
How can one throw such a nice lamp, despite its
shortcomings.
I dismantled my Kulla black floor lamp for this project. Reason was because I forgot how to dismantle the lamp housing for the Kulla red table lamp. In the process, I had shorted the dimmer switch which I mentioned above. I am going to replace that with the Ikea Dimma Switch.
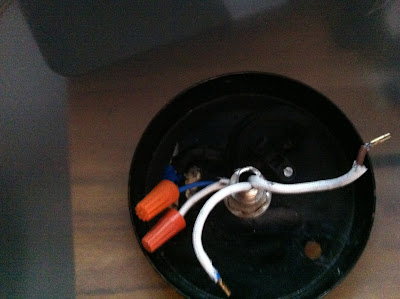
The cable compartment for the Kulla black floor lamp. I had removed
the white dimmer switch. You can see the hole where the sensor switch
was originally located.
I removed the unnecessary wires.
Putting in the compartment cover.
The socket holder goes in next.
I put back the original sensor switch. Thankfully I still have the
switch.
The bottom half bulb socket goes in.
The wires are connected to the top half of the bulb socket and
clipped in.
Connect to the Ikea Dimma Switch.
Dimma switch on the sofa.
TAAAA-DAAAAA
Next, pictures of the 2 different bulb sockets.
The one on the left is from the Kulla red table lamp. The 2-halfs are screwed
on to each other. It is badly chipped because I used a pair of pliers to unscrew it.
The one on the right is clipped on.
A view of the inside.
This is the view of the clip-on bulb socket. the Red and Blue wires
goes into the 4 small holes on the right.
Another view of the socket.
Initially, this project was quite daunting. It was made worst when I had forgotten the steps on dismantling the lamp. I had to revert to my Kulla floor lamp and even then, I shorted the dimmer switch.
Overall, it was a good experience. Once I found the steps, it was easier after that. I hope you would find the information useful as well.


